Calibrating DJI Camera Multi-spectral (RGN, OCN, NDVI) Images
This page explains how and why we calibrate images used for measuring the reflectance of materials such as vegetation in a crop field.
Why Is Calibration Necessary?
Our sun emits a large spectrum of light which is reflected by objects on the Earth's surface. A camera can be used to capture this reflected light in the wavelengths that the camera's sensor is sensitive to. The sensors that we supply are based on silicon which is sensitive in the Visible and Near Infrared spectrum from about 400-1200nm. Using band-pass filters that only allow a narrow spectrum of light to reach the sensor we can capture the amount of reflectance of objects to that particular band of light.


For instance if the camera's filter selects two 25nm wide bands with peak wavelengths of 660nm and 850nm (see below graph) it will only capture the reflected "red" and "near infrared" light emitted by the sun around those wavelength peaks. These are the peaks in the NDVI (Red+NIR) filter we sell cemented to the bottom of the 3.97mm (recommended), 4.35mm, and 5.4mm lenses. Each pixel in the image's RGB channels is thus a percentage of the reflected light allowed to pass through the filter.

Pixels have a value that range from a minimum to a maximum based on the image bitrate. The higher the bitrate the more information that can be stored in the image. A sensor captures each image in a RAW format and then saves the RAW or converts it to a more common format (typically by compressing it). The DJI cameras capture 8bit (per channel) DNG photos, which means there are 8bits (256) pixels and a pixel value range from 0 to 255. When the camera saves a JPG it compresses (removes) the original pixels leaving a range of only 0 to 255 and noticeable compression if you zoom in. Since we are capturing a reflectance of light and not trying to make a "pretty picture" we want to always use the DNG format. If you need a JPG you can easily convert the DNG to TIFF to JPG using our MAPIR QGIS plugin (see below).
Always set the camera to RAW (DNG) mode for the best results, as calibrating the JPGs will further compress them and it may make it difficult to stitch. If you need JPGs as the final result (such as for online services like Drone Deploy) you can save the TIFFs as JPGs during calibration.
It is important to also make sure the camera settings (shutter speed, ISO, EV, White Balance) are adjusted so that no pixels reach the maximum pixel value. If a pixel would normally be higher than the max value the information will be lost. Here are the recommended settings to use (required if not using our reflectance calibration target):
DJI X3 NDVI (Red+NIR):
Photo Mode: DNG+JPG
Shutter Speed: 1/4000s
ISO: 100
Ev: 0
White Balance: Custom
Color: DNG/None
DJI Phantom 4/3 NDVI (Red+NIR):
Photo Mode: DNG+JPG
Shutter Speed: 1/1000s
ISO: 100
Ev: 0
White Balance: Custom
Color: DNG/None
You may notice that the images from the DJI cameras with the above settings seem dark. This is normal as we have set the default settings to keep the pixels from reaching the max value. Remember, you are capturing a percent of reflectance not making a "pretty picture".
That brings us to calibration. Just because we have captured a percentage of reflectance in each pixel, how do we know if it is correct? The DJI cameras are not "calibrated" from the factory for reflectance calibration. We need something then to calibrate each pixel using a known reflectance value. We do this by capturing a photo of our MAPIR Camera Reflectance Calibration Ground Target Package just before each survey, which contains 3 targets that have been measured at incremental wavelengths by a spectrometer (a calibrated lab instrument). The pixel values of the captured target image are then compared with the known reflectance values of the targets. Using this information in our MAPIR QGIS plugin we then transform the pixel values and thus calibrate the survey images.
Once the images are calibrated you can stitch them together into a single image called an ortho-mosaic, or "ortho" for short. The resulting ortho images can then have some indice calculations performed on the pixels to produce different types of analysis.
The normalized difference vegetation index (NDVI) is the most common analysis and compares reflected red and near infrared (NIR) light to assess where plants are most "healthy". We assume that given a sample area of a single crop, the plants which are reflecting more NIR light will be performing more photosynthesis and thus are healthier (and vice versa). If a certain region of plants have a NDVI value that is higher (values range from -1 to +1), then the plants are likely healthier there. No matter what index analysis you perform it is vital that you also physically inspect the subject area to verify your results, a process commonly called "ground truthing".
How To Calibrate Your Images
After you have pre-processed your images you have the option of stitching them into the final orthomosaic or calibrating each photo before stitching. Typically it's better to stitch the non-calibrated images and then calibrate the orthomosaic due to possible issues with stitching the calibrated images. This is especially important with point-cloud software like Pix4D and Photoscan to calibrate after ortho generation.
To begin calibration, open the QGIS MAPIR plugin and click on the Calibrate tab:

Select your camera model from the drop-down menu.
If you have an image of the MAPIR Camera Reflectance Calibration Ground Target Package taken just before your survey (recommended) then click the first Browse button and select the QR target image. When the software has detected the QR target the dialog box on the right will let you know if it was successful.
If none of the images are able to be used to detect the QR code the program will automatically use the hard-coded values we supply which are taken during a clear sunny day. There may be a slight inaccuracy if the hard-coded values are used so make sure to capture a few good images of the target shortly before your survey for the best results.
After the plugin has obtained the necessary calibration values click the lower Browse button to select the input image directory. A Calibrated folder will be automatically created in the input folder for the calibrated images. If you would like the calibrated TIFFs to be converted to JPGs please select the "Convert Calibrated TIFFs to JPGs" box. To begin calibration select the "Calibrate Images" button.
Further Processing Calibrated Images
Each pixel in the images now represents a percentage of reflectance for the photographed area. They may be dark (not bright), but don't worry this is normal. Remember, you are capturing reflectance information, not a 'pretty picture".
You will now want to upload the images to the software you are choosing to generate the ortho-mosaic image.
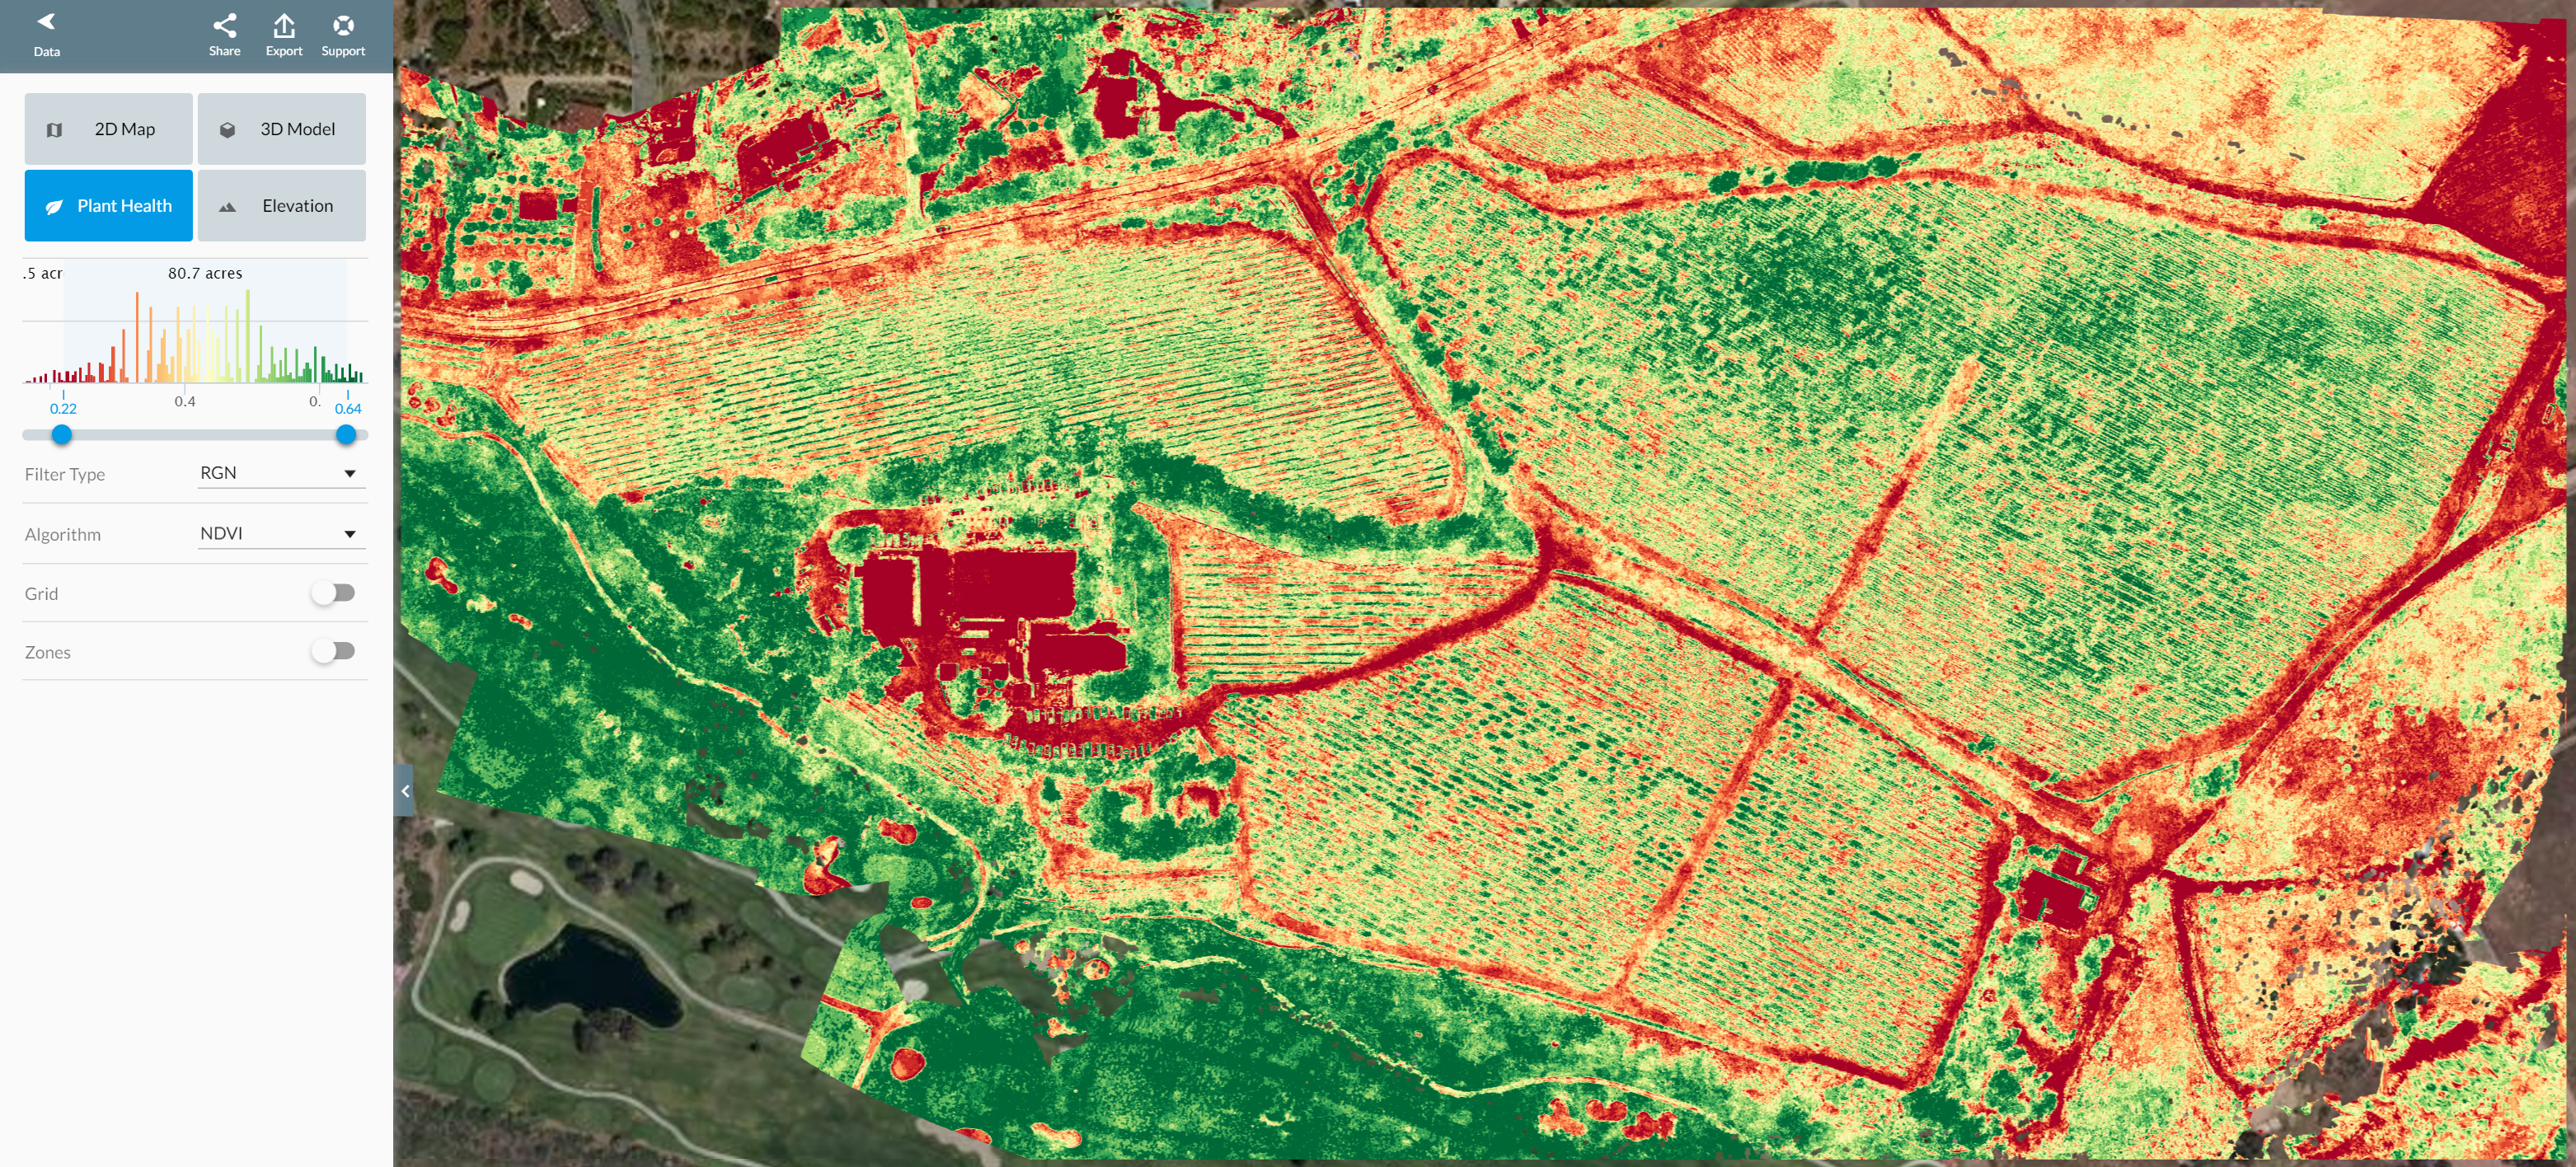
Drone Deploy supports our NDVI (Red+NIR) filter setup and it's an easy way to get calibrated NDVI results. Once processed simply choose the Plant Health feature, choose the RGN filter and the the NDVI index.
If you are not processing your images in Drone Deploy, you will need to stitch the ortho-mosaic using your own software (ie Pix4D) and then process the NDVI index yourself. The reflected red light will be in the image's red channel and the reflected NIR light will be in the blue channel. Using the NDVI formula you will then create the black and white index image:

So the formula in the rastor calculator will look something like: ndvi = (blue-red)/(blue+red). Where blue is the 3rd RGB image channel and red is the 1st RGB image channel.
Here are some further examples:
Camera: DJI Phantom 3 - 3.97mm NDVI (Red+NIR)
Ortho Software: Drone Deploy

